FAQ – Frequently Asked Questions
Welcome to our Frequently Asked Questions (FAQ) section!
On this page you’ll find answers to the most common questions our customers usually ask.
Our goal is to provide you with the necessary information clearly and concisely to resolve your doubts quickly and efficiently.
If you can’t find the answer you’re looking for, don’t hesitate to contact us via chat or by using the Contact Form. We’ll be happy to assist you!

About the use of SaveTheProof
Yes. We take information security very seriously. In addition to internal controls and audits, we have ENS certification (National Security Scheme).
This certification is obtained after undergoing a thorough security audit by a third party accredited by ENAC (National Accreditation Entity). You can view our certificate here: ENS Certification.
If you have any doubts about the security of the platform, don’t hesitate to contact us, and we’ll be happy to assist you.
We will issue a certificate in PDF format with legal validity. The certificate will contain screenshots that prove that your evidence is real. Our certificates are digitally signed and incorporate a time stamp. Click here to find out more information about our certification system.
No. There is no need for software installation. We provide a very fast and easy-to-use certification system. With just a couple of clicks you will have access to your certificate.
The acronym ‘UTC’ stands for ‘Coordinated Universal Time.’ It is the worldwide standard for timekeeping, serving as the basis for time measurement in different time zones. It is also colloquially known as Greenwich Mean Time (GMT), although there is a small technical difference between GMT and UTC. UTC is used to synchronize clocks and events worldwide.
UTC is the time unit we use at SaveTheProof for issuing certificates, ensuring that the time reflected in the document is not subject to interpretation but is an absolute and reproducible value globally.
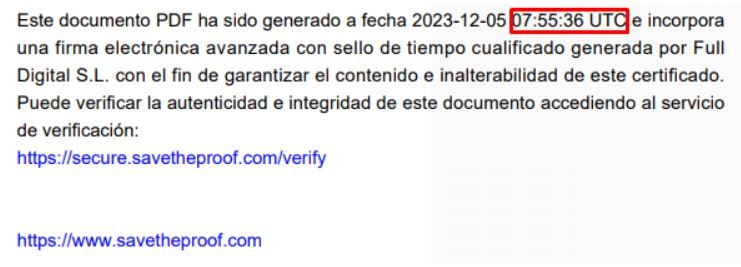
Example of UTC time in SaveTheProof certificates
Web Browsing Session Certificates
Yes. If you’re certifying a site where you need to access with a username and password stored on your device, or if the URL of the webpage you need to access is too long to type manually, we recommend enabling SaveTheProof’s access to your local device clipboard so you can copy and paste the data without having to enter it manually.
When you perform your first browsing session certification, the system will display this message before starting the process:
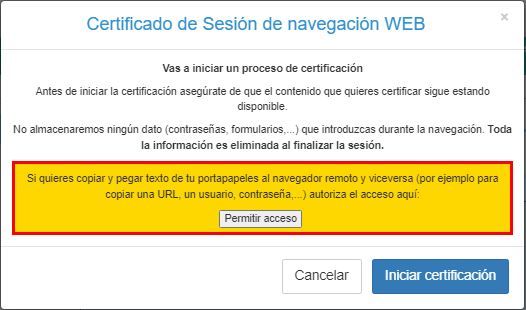
Once you click on “Grant access,” your browser will also display a message asking you to allow the use of the clipboard by our platform:
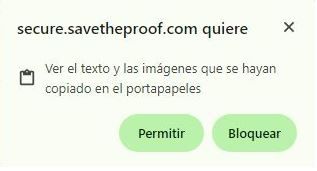
Once clipboard usage is authorized, our platform will display this message indicating that you can copy and paste text from your device to the remote browser:
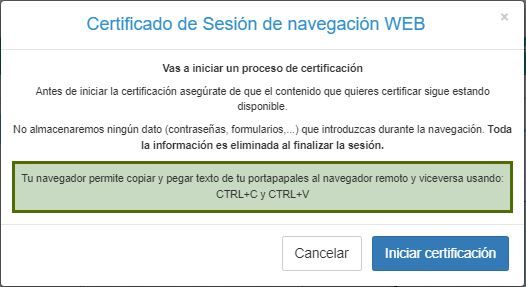
You can leave this permission active for future certifications, or if you prefer, after certification, you can access your browser settings and deactivate it.
When a browser session certificate is created, there is an option to view the captured video. In order to view it, you are asked for a password.
We explain how to obtain it: VIDEO.
After recording a web browsing session and certifying it on SaveTheProof, you will have access to the session video in the ‘View my certifications’ section of your account.
If you wish, you can share this video by providing the ID and password of the video to the interested party, who can access it through the following link: https://secure.savetheproof.com/video

ID and password to view the video recording of the web browsing session
However, if you need to download the video locally to your computer, you can do so from the Download Video button:
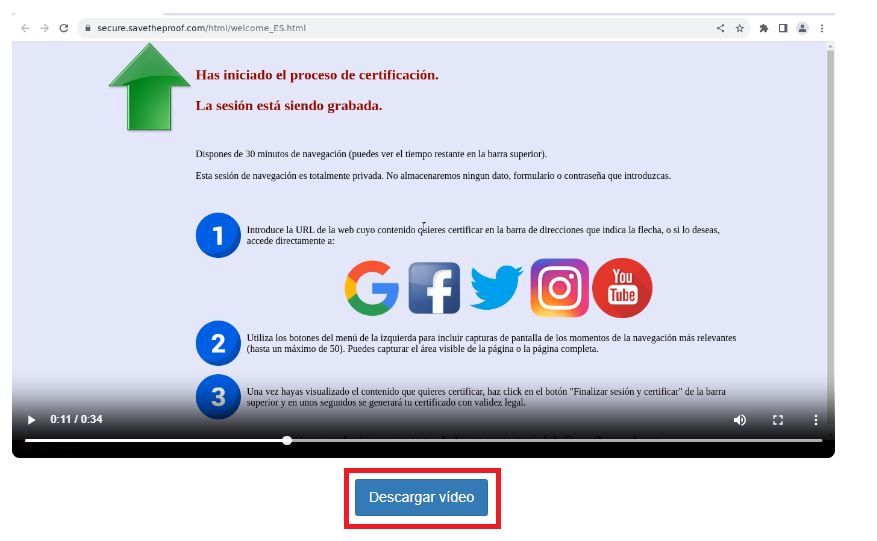
The answer is YES. And we’ll explain how:
- To certify a chat on Telegram, you need to subscribe to the Web Browsing Session option..
- Once inside SaveTheProof’s virtual browser, you have to access the Telegram website: https://web.telegram.org/, scan the QR code with your mobile device, and start your user session from SaveTheProof
- When you’re inside the chat you want to certify, select the ‘Full Page’ button from the menu on the left side of the SaveTheProof screen.
- Once you have captured the content, you can ‘End Session and Certify’.
You’ll have the certificate for the Telegram chat available for download in ‘My Web Browsing Session Certificates’.
To certify a PDF document available on a webpage (such as legal bases, contracts, privacy policies, terms and conditions, annual reports, technical manuals or datasheets, user guides, etc.), you need to perform the certification from a Web Browsing Session.
Once you have started the web browsing session on SaveTheProof, go to the webpage where the link to the PDF you want to certify is located.
Open and download the PDF. Click on the link to open the PDF and then download it.
By downloading the PDF, it becomes part of the certificate issued by SaveTheProof.
Additionally, the certificate includes a copy of the PDF document, inside the ZIP folder, along with the browsing metadata.
This way, you will ensure that the PDF document is properly certified.
My user account on SaveTheProof
To enhance the security of accessing your SaveTheProof account, we recommend activating Second Factor Authentication or 2FA.
Using 2FA involves activating an additional layer of security alongside your user password. This second verification ensures unequivocally your identity, as only you will have access to the temporary numeric password generated by the two-step verification app you’ve configured. This prevents unauthorized access to your account, providing additional protection against potential impersonation.
It’s extremely easy to use while enhancing the security of accessing your user account.
To activate 2FA on SaveTheProof, follow these steps:
1. Log in to your account and go to the link you’ll see at the top of the screen:
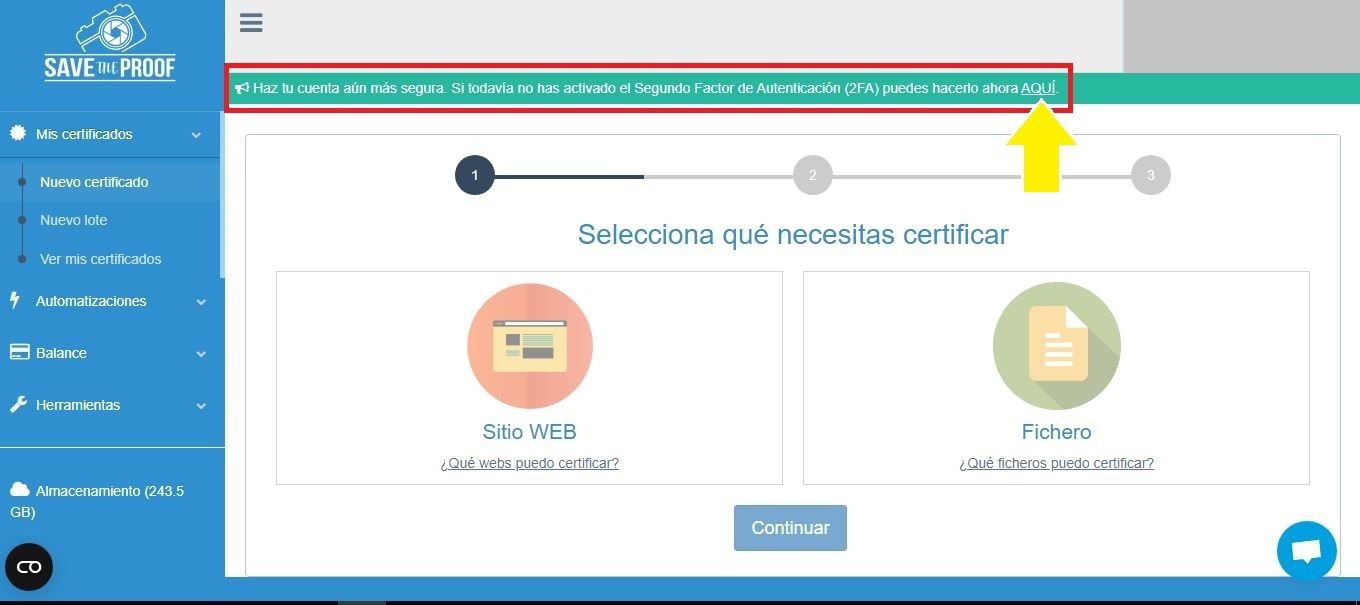
2. By clicking on the link, you’ll be taken to the My Billing Information screen, where at the bottom, you’ll find the “Second Factor Authentication” section and click on “Generate Key“:
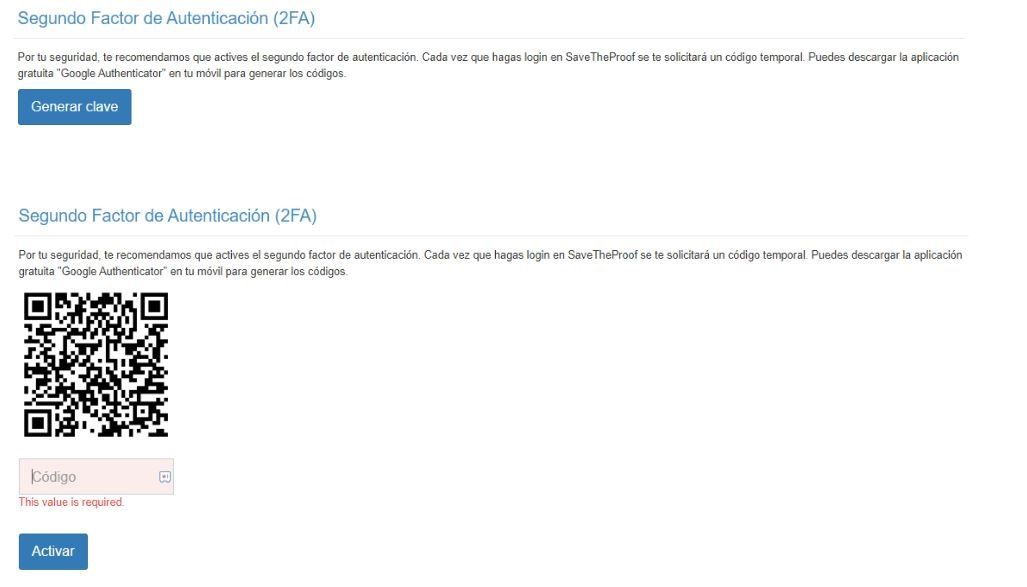
3. As you can see, you need to scan the QR Code from the screen to generate the first activation code.
For this, you’ll need to download from the Play Store of your smartphone one of the free authentication apps available (Google Authenticator, Microsoft Authenticator, Duo, or Authy) which are very easy to set up.
The most commonly used is Google Authenticator, available for Android and iOS:

Once configured, you can scan the SaveTheProof QR code, and the app will provide you with a **six-digit numerical code** to enter, thus linking 2FA to your SaveTheProof account.
Now, every time you access SaveTheProof and log in, you’ll need to enter your usual username and password, and then this second authentication step by entering the numeric “Code” the app provides you (the code updates every 30 seconds):

Don’t hesitate and improve the security of accessing your SaveTheProof account.
For any questions or inquiries, you can contact us through the chat or by emailing: [email protected]
If you access your user account on SaveTheProof and in the content of the table of My web browsing session certificates you don’t see the last column of Tags, don’t worry, they haven’t disappeared, it’s just a matter of your screen display mode.
If you encounter this view without the Tags column at the end:

The first thing you can do is to reduce the zoom.
After reducing the zoom, you will see the Tags column again (to reduce zoom, press the Ctrl key on your keyboard and move the mouse wheel):

Another way is to open the dropdown with the blue plus symbol (+) where the tag information is contained:

Problem solved!
When you are a user of SaveTheProof within a company plan, you will have the option ‘My Organization’ visible in the left-hand side menu, from which you can view all relevant account information and certificates issued by your team.
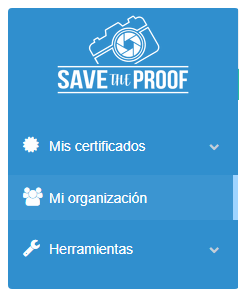
In one screen, you’ll be able to view the total credits contracted, the subscription start and end dates, as well as the balance in the number of available credits.
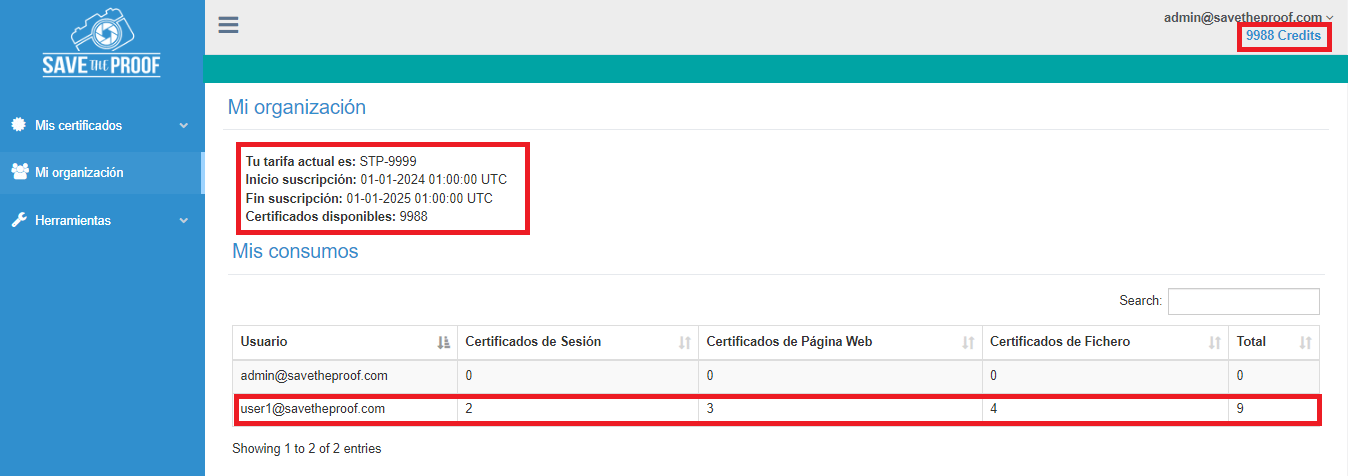
The number of available certificates, or credits, is updated based on the certificates that authorized users generate. One credit is deducted for each issued certificate.
From the ‘View my certificates’ option, you can see and access the certificates issued by different users, manage the certificates, edit tags, etc.

For any questions or inquiries, contact us via chat or by emailing [email protected]
About WhatsApp to PDF
When printing your WhatsApp chats to PDF, you may encounter the following limitations:
- Comments on images are not printed
- Thumbnails of sent links are not displayed
- Calls are displayed as “null”
Depending on the version of WhatsApp you are using, there may be other limitations not listed here. If you have any questions, feel free to contact us, and we’ll review it together and assist you.
In some cases, when sending/receiving attachments, comments are included that you can fully view in the chat on your mobile device. However, when exporting, the system only identifies the attached image, omitting the associated comments. Therefore, these comments will not be reflected in the PDF export, only the attachment image.
In the case of a missed call, it will not be reflected in the PDF export.
Printing WhatsApp chats to PDF has a limitation of 1,000 messages per PDF. If the date range you need to print exceeds this limit, the solution is to select shorter time periods to print, allowing you to have the chat divided across multiple PDFs.
Thumbnails of media content sent (videos, audio files, news images, etc.) will not appear in the PDF, but the link to the content will be included.
For WhatsApp messages sent or received with a video, image, or any other multimedia file to appear in the PDF, it is necessary to view or download them from the WhatsApp chat before starting the import process in SaveTheProof.
Affiliate Program
If you have an active Affiliate Program on SaveTheProof, you will see the option ‘My Affiliates’ activated in the left-hand menu from your user profile. From there, you can view the status of your commissions.
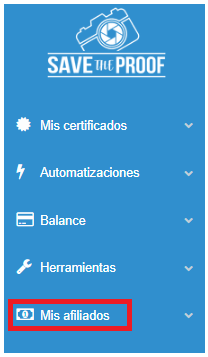
From this section of ‘My Affiliates,’ you have the options of ‘Codes’ and ‘My Earnings.’
Here’s an explanation of the information contained in each:
From ‘Codes’:
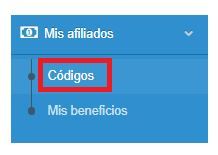
You’ll be able to view the active code for your affiliates, the distribution of the 15%, between the user discount and the promoter commission, established in the contract, and the start date or activation date of the affiliate program.

From ‘My Earnings’:
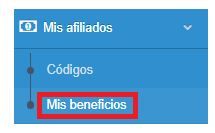
You’ll have access to the summary of consumption for each registered user (identified by their email) with your affiliate code. You can view the details monthly by filtering by month, year, and clicking the ‘Search’ button.

Or, you can view the total commissions by choosing the ‘Total’ option, selecting the year, and clicking the ‘Search’ button to filter:

My Users: From here, you can view the users who have registered with your Affiliate code.

If you have any questions or inquiries, please contact us via chat or by emailing us at [email protected]
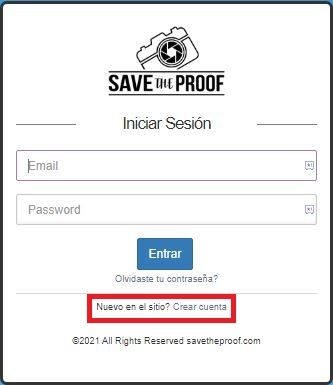
1. Login > “Sign Up” on SaveTheProof.com
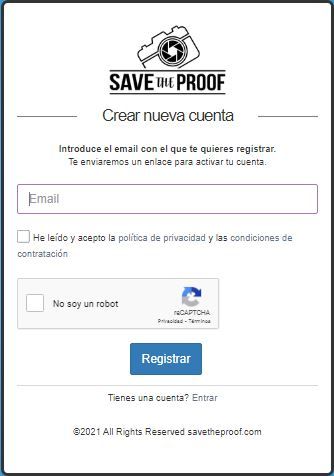
2. Fill in your details and click “Register”:
3. You’ll receive a welcome email from SaveTheProof at the email address you provided. In this email, there will be a link that you need to open to activate your account. At this stage, you’ll create your password, select your country, and enter your affiliate code under “Do you have a referral code?”. Click “Activate”
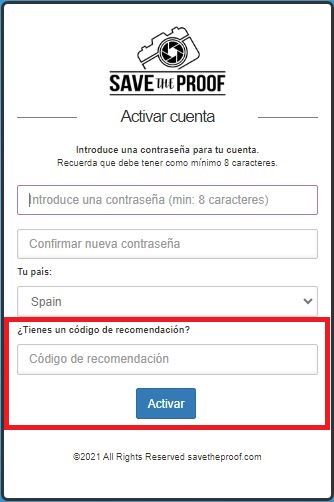
If you skipped this step or forgot to enter the affiliate code, please contact us via chat, contact form, or email at [email protected] so we can manually activate it for you.
Would you like to request a DEMO?
Choose a day and time to discover how SaveTheProof will change the way you certify content.


